Setup and Configuration
To set up Fulfillment by Amazon (FBA) for your store, settings must be configured for:
- The plugin
- Shipping
- Products
Plugin settings
To configure the plugin on your WooCommerce store, have ready your login and password for your Amazon Professional Seller account.

- Go to: WooCommerce > Settings > Integration.
- Select the region/country that applies to your store under Register for MWS.
- Log into your account at the Amazon website.
- IMPORTANT: Amazon is in the process of changing the entire process for MWS registration. Use step 5 OR 6-7 as appropriate to your account.
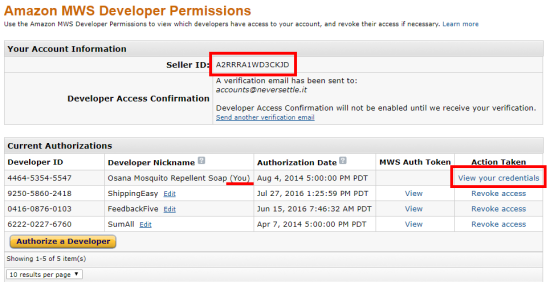
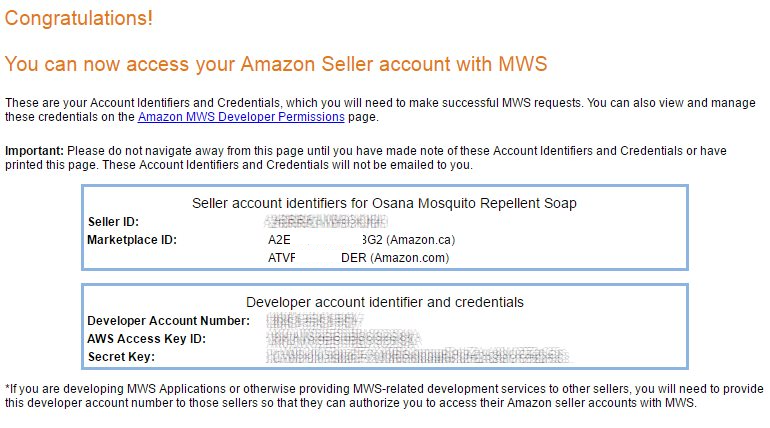
- NEW PROCESS: After logging into the MWS Registration with your Seller Central account, if your screen looks like this one, then find your account and credentials info in the Amazon MWS Developer Permissions section:
- OLD PROCESS: After logging into the MWS Registration with your Seller Central account, if your screen looks like the one below, select “I want to get my credentials for accessing my own Amazon seller account with Amazon MWS.”
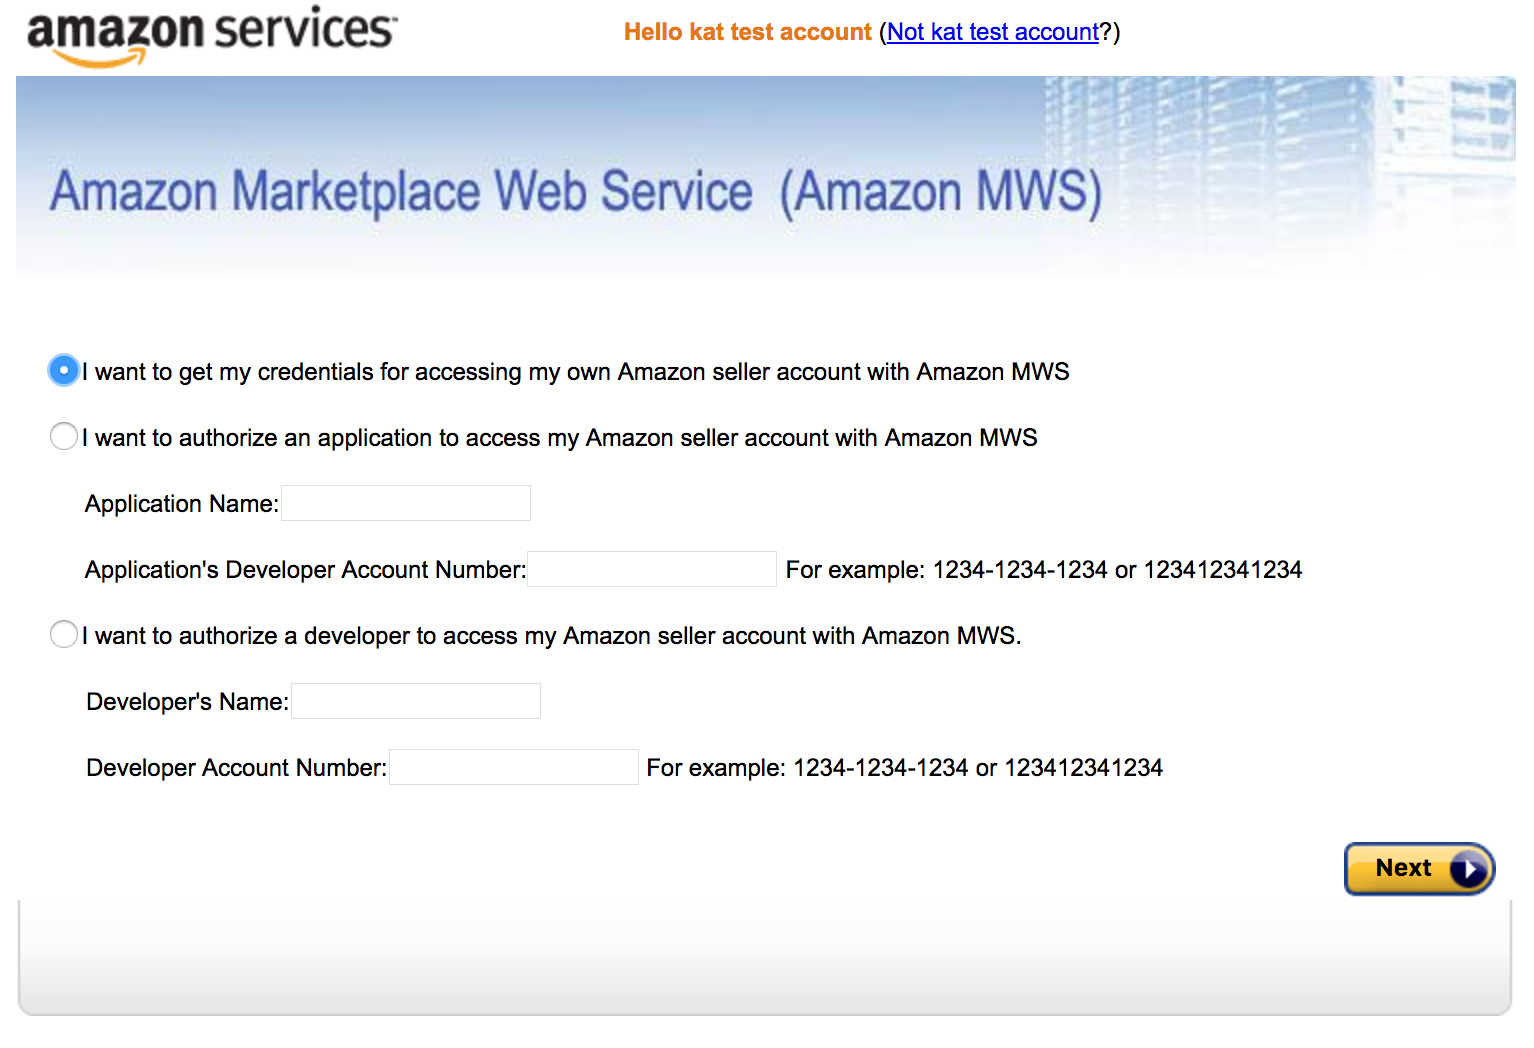
- Select Next to access your credentials. Keep this open for step #6.
- Return to your WooCommerce store settings and use the dropdown to Select Home Region.

- Copy and paste the relevant credentials and information from your Amazon account in step #4 for the next settings:
- AWS Access Key ID
- AWS Secret Access Key
- Amazon Merchant/Seller ID
- Amazon Marketplace ID
- Enter an Application Name without spaces and Application Version for your app. Hover over the ? for an example.
- Click the Test MWS Connection button. If you entered all credentials correctly, a success message appears at the top and further settings appear underneath.Be patient and work your way through each setting, hovering over the ? for explanation and assistance. You need only do this once or when you wish to make changes.
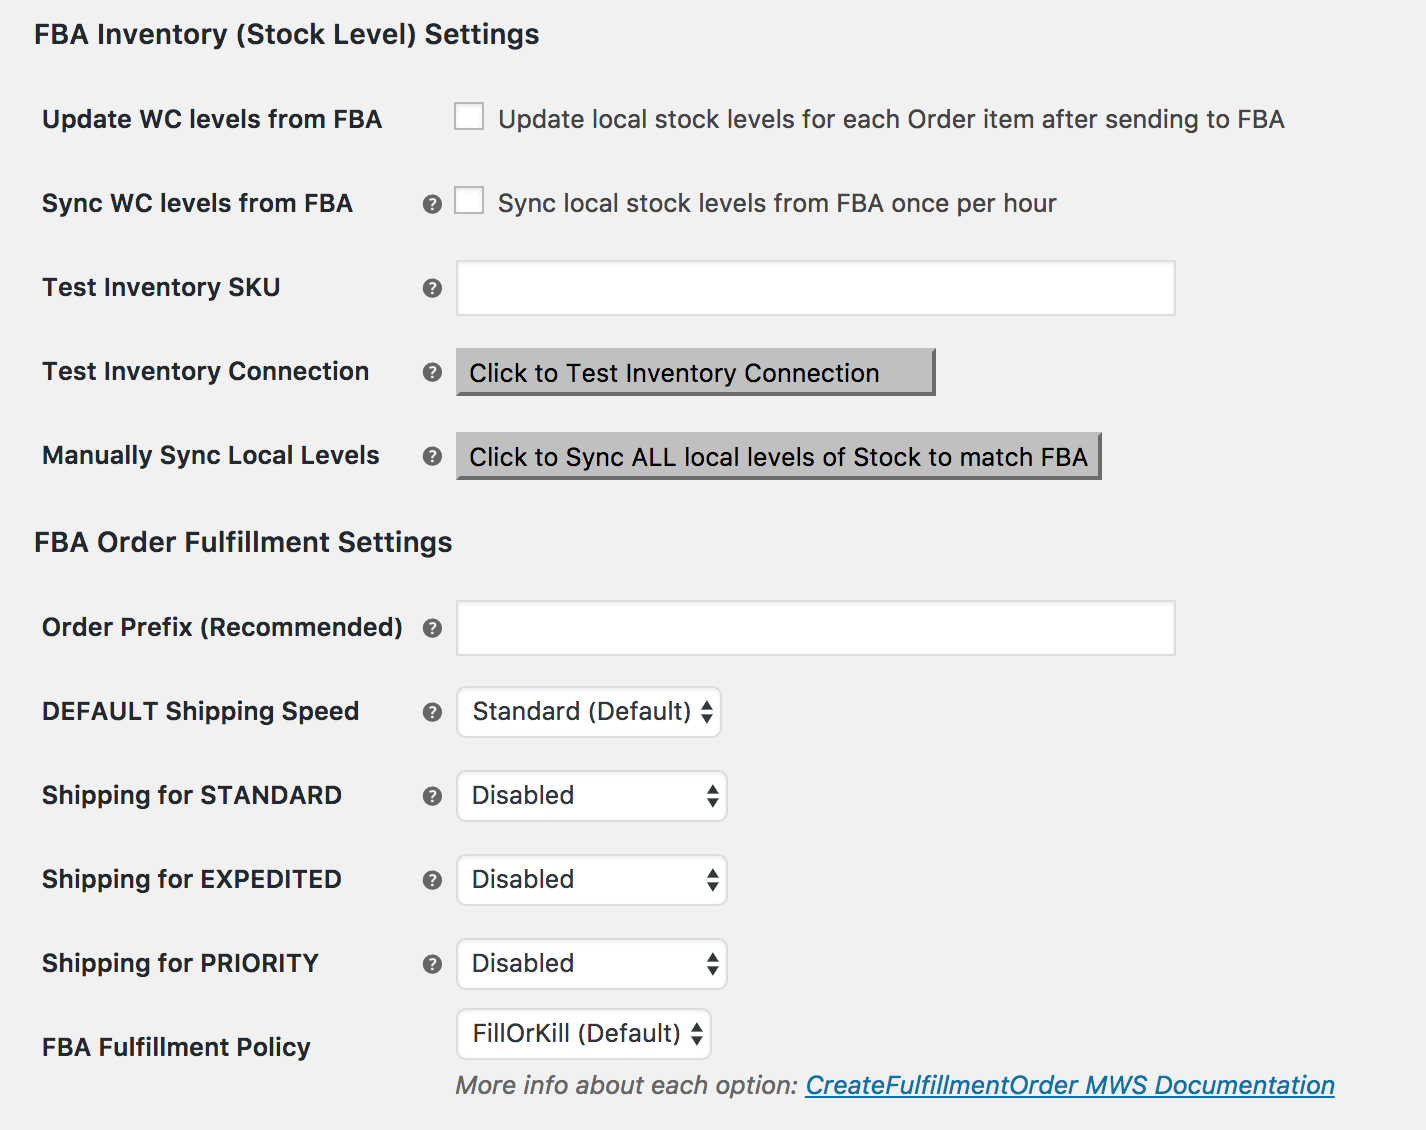
- Enter your selection for each of the FBA Inventory Settings:Most stores will likely want to tick both stock level sync checkboxes to have them turned ON.
- Update WC (WooCommerce) levels from FBA
- Sync WC (WooCommerce) levels from FBA
- Test Inventory SKU (your store should have at least one item set up on FBA and your store with the same SKU as advised above)
Run a full stock level sync between all products after initial setup and after inventory is set up. If you have a lot of products, this might take some time. For this to work properly, you must have WooCommerce stock level management settings turned on both at the store level and individual products level.
- Configure the FBA Order Fulfillment Settings:
- Order Prefix: Use an prefix that helps you identify fulfillment orders in FBA reports and tools on Amazon, e.g., fba or ama or anything that works for accounting.
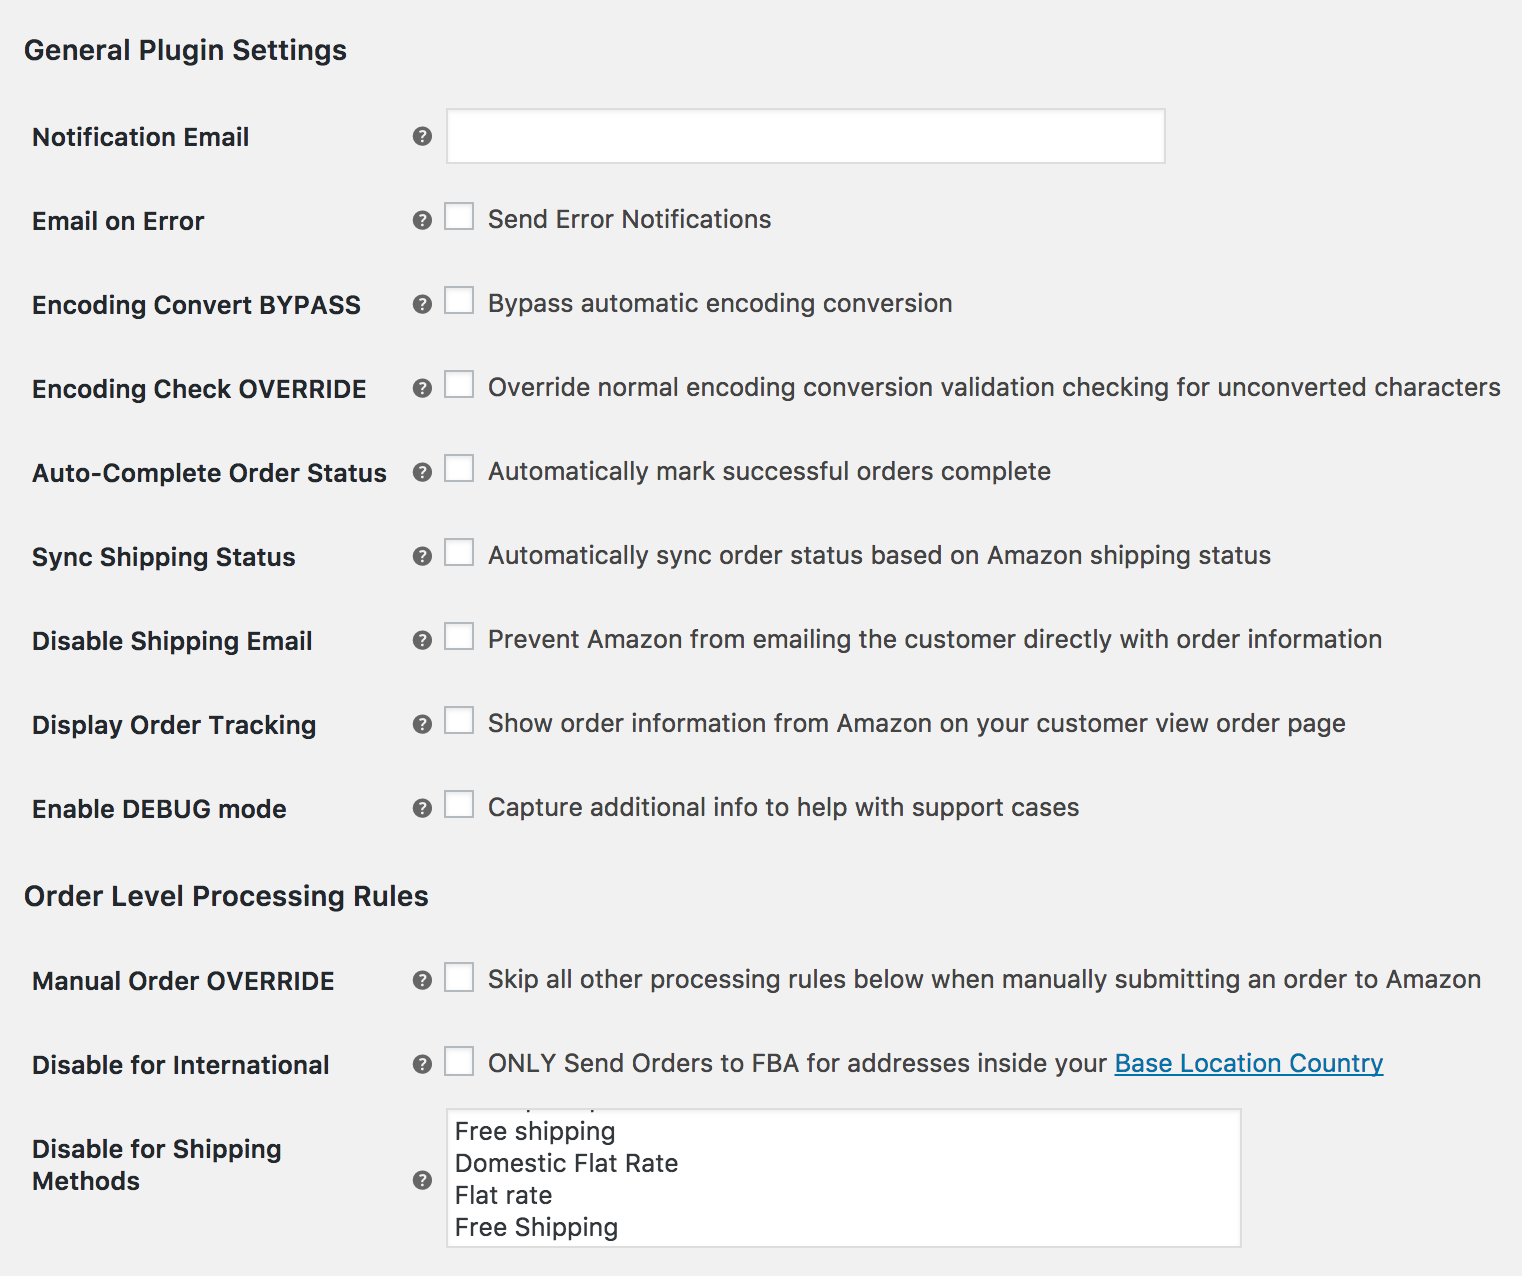
- Enter your selection for each option under General Plugin Settings.
- If you want to receive shipping and error notifications at an email address different than the WordPress admin email address setting, then provide an address in the “Notification Email” setting.
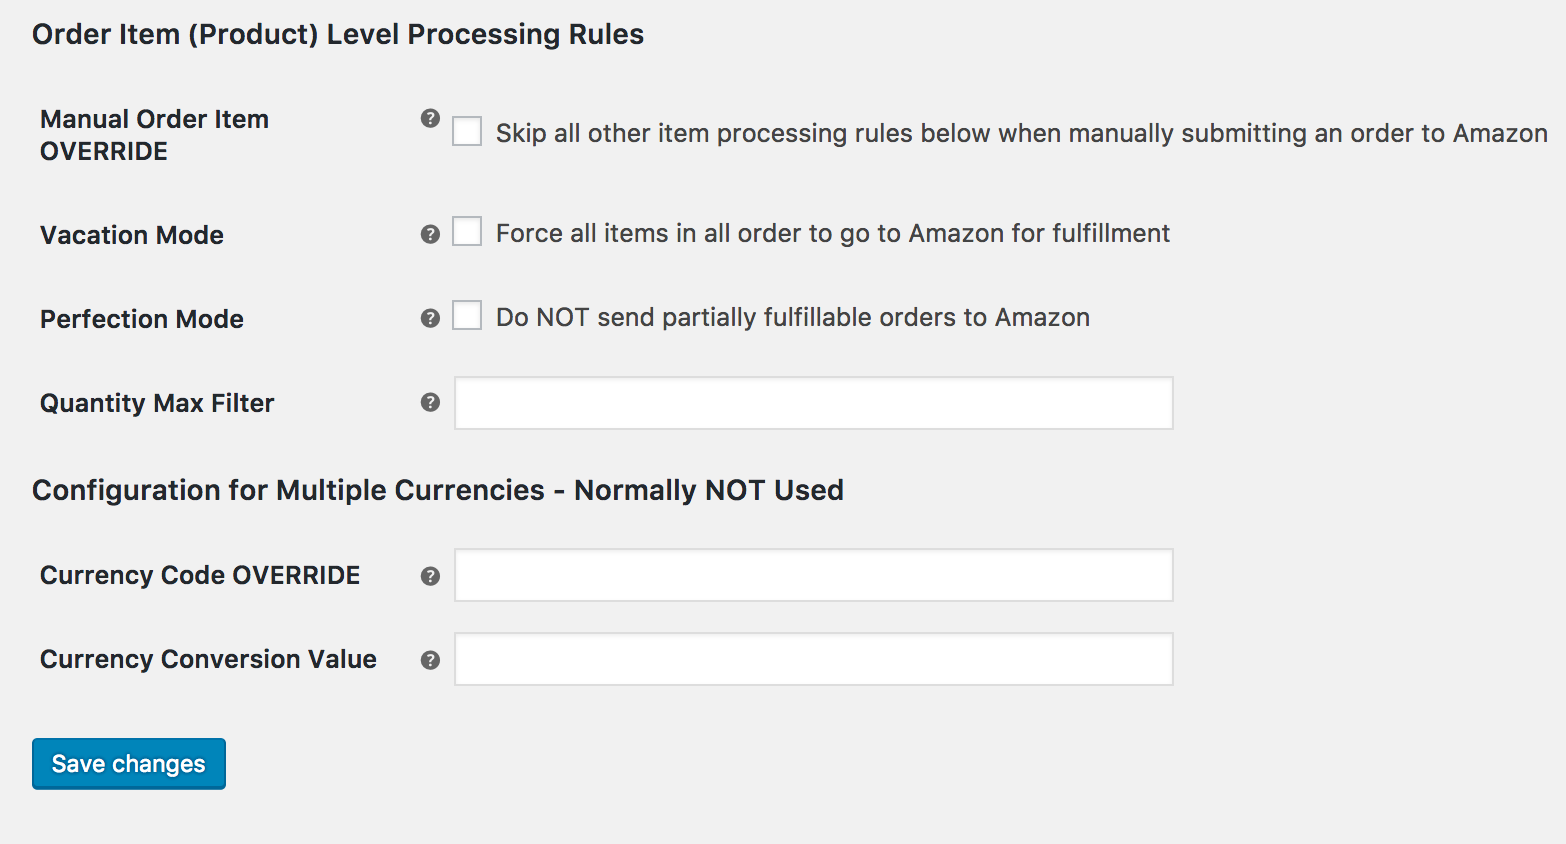
- Enter your selection for each option under Order Item (Product) Level Processing Rules.
- Save changes.